Cultivated turf allows you to enjoy a lawn of instant beauty and maturity without the usual time-consuming hassles of seeding. The following are the basic steps to a beautiful lawn. Check with Talbot Turf for any further recommendations for your specific area.
STEP 1 – Soil Preparation
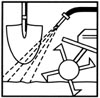
For best result, rotavate or spade the area to a depth of 10 to 15 cm. (4 to 6 in.). Eliminate drainage problems by having soil slope away from foundations, etc. Then rake in fertilizer, lime, peat, compost, etc. as needed to a depth of 7 to 10 cm. (3 to 4 in.). Rake and smooth the soil removing rocks, roots, and large clods.
Roll the area lightly with a lawn roller 1/3 full of water. This will firm the soil surface and reveal low areas that need more soil. Keep the grade 2 to 3 cm. (1 in.) below sidewalks or driveway.
Water the prepared area to settle soil and provide a moist base for turf. Moistening to a depth of 15 cm. (6 in.) is recommended for most soils. However, consult with Talbot Turf regarding your specific soil needs.
STEP 2 – Turf Installation
Install your lawn immediately upon delivery. Begin watering lawn within 30 minutes of installation. Turf is a living plant that requires ground contact and moisture to survive!
In hot weather, protect unlaid turf by placing stacks in shade, covering with moist burlap sacking, and/or sprinkling.
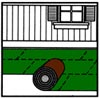
Begin installing turf along the longest straight line, such as a driveway or sidewalk. Butt and push edges and ends against each other tightly, without stretching. Avoid gaps or overlaps. Stagger the joints in each row in a brick-like fashion, using a large sharp knife to trim corners, etc. Avoid leaving small strips at outer edges as they will not retain moisture. On slopes, place the turf pieces across the slope.
To avoid causing indentations or air pockets avoid repeated walking or kneeling on the turf while it is being installed or just after watering.
After installing the turf, roll the entire area to improve turf/soil contact and remove air pockets.
STEP 3 – Watering
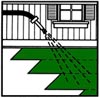
Give your new lawn at least 2 to 3 cm. (1 in.) of water within 1/2 hour of installation. Water daily, or more often, keeping turf moist until it is firmly rooted (about 2 weeks). Then less frequent and deeper watering should begin.
Weather conditions will dictate the amount and frequency of watering. Be certain that your new lawn has enough moisture to survive hot, dry, or windy periods. Water areas near building more often where reflected heat dries the turf.
Caution
During the first three weeks, avoid heavy or concentrated use of your new lawn. This gives the roots an opportunity to firmly knit with the soil, and insures that the turf will remain smooth.
Maintenance
Your new lawn increases your property value significantly. With proper care, it will remain a great asset, providing beauty, a clean playing surface, and an improved environment.
Mow often, generally removing no more than 1/3 of the grass height at a mowing. Keep your mower blade sharp. Follow Talbot Turf mowing recommendations for your type of lawn.
Fertilizer and chemical applications will depend on climate, turf type, soil, insects, weed and disease conditions.
For fertilizer and maintenance requirements, consult Talbot Turf.